
By Anthony Grimani, President of Performance Media Industries, SonitusUSA, and Grimani Systems
What do we know about home theaters? After working on more than 1,500 projects during our combined 100+ years of experience in the post-production, recording, and audio business, including key positions at Dolby Laboratories, Lucasfilm THX, Christie Digital, and the famed Record Plant studio, the team at Performance Media Industries Ltd. (PMI) has developed a series of best practices and insight into the things that really affect your home theater sound quality, and what you can do to improve them!
Check out the Top 10:
1. Clean up your room acoustics. The most important thing you can do is to add an acoustical treatment package. Why? More than 50% of what we’re hearing is reflected sound bouncing off the walls, ceiling, and floor after leaving your speakers! It stands to reason that you should pay some serious attention to those room surfaces and take control of the acoustic interface.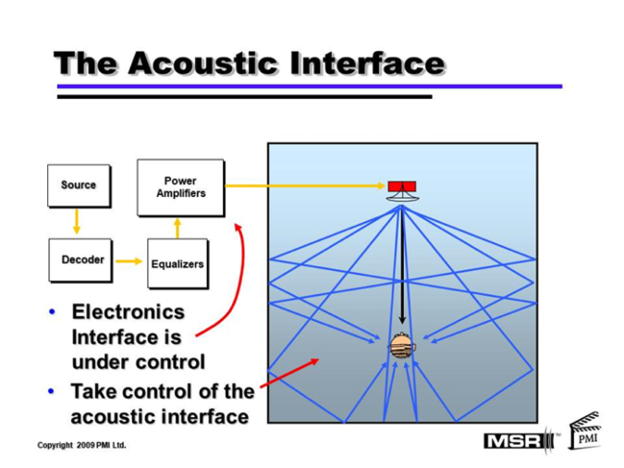
Controlling of the acoustic interface is solved by installing various acoustical treatment panels that hang on the walls and ceiling to effectively control the sound waves that ping-pong around the room. These add-on panels come in various sizes, shapes, and colors, and can even have custom artwork printed on them to match your design aesthetic. They remove the booming echoes that muddle up your soundtracks, while retaining the actual character and fidelity of voices and instruments. By following simple formulas we derived from engineering hundreds of rooms over the last 30 years, you will get great results. We at Sonitus USA have solved your acoustical problems by producing pre-engineered, ready to install, acoustical system packages for all room types. So, here is a short recipe for a successful acoustical tuning system:
Acoustical Recipe
- Cover about 15% to 20% of your wall and ceiling surfaces with absorption panels; not any more than that. If you go higher than 20%, you will end up with unpleasant sound quality, searching for the next gizmo to get you to audio nirvana.
- Spread the absorbers evenly around the walls. On the ceiling, apply them mostly towards the front of the room.
- Cover about 20% of your walls and ceiling surfaces with scattering panels (aka diffusers). Here again, don’t go much past that.
- Interleave the diffusers with the absorber panels along the walls. On the ceiling, apply them mostly towards the back.
- Add in some bass absorption (aka bass traps) in the corners of the room where you hear the loudest bass energy. Play pink noise, or Pink Floyd, and go listen.
2. Calibrate your system. There are dozens of tuning steps involved in setting up a home theater sound system, and you better get all of these correct if you want a good return on your investment. Proper calibration starts with configuring the component settings and debugging any connection errors. You also want to verify that all the products work as advertised. You then need to correct what the room's acoustical thumbprint is doing to mess up the frequency response of each speaker. That’s ideally accomplished by carefully measuring and analyzing their responses, moving them around for best results (see below), and setting correction filters in a digital equalizer. Some of the “robotic” auto-EQ schemes can work, but you should use these as judiciously as you would a microwave oven to prepare a fine meal. It could all come out rubbery and tasteless… After equalization, you set the acoustical levels of all the speakers to motion picture reference levels (85 dBC SPL for 0 dBr/-20 dBFS input signal; 75 dBC for internal test tones) by adjusting the channel level trims in your surround decoder or external digital equalizer. Finally, you synchronize the arrival times of the direct sound from the speakers to your main seat. That is done by entering the speaker distances into the surround decoder or setting the appropriate digital delay times in your equalizer. Of course, you should also listen to your favorite program material to make sure it sounds amazing!
3. Select the right speakers. Some speakers are just not up to the task of filling a home theater with dynamic, accurate, and reliable sound. You need a system with enough horsepower, the proper frequency response, and full sound power to get the full experience. Ideally, the three front speakers should be concealed behind an acoustically transparent projection screen at mid-height of the image, and they should fire down to all the listeners with consistent results at all frequencies. The front speakers handle the majority of the sound pressure; each one needs to produce 100dB Sustained, and 105 dB bursts at the listening area. Those are serious levels! Front speakers also need to fully and competently cover the entire listening area with no losses in any region of their spectrum. That takes some careful and sophisticated speaker engineering work. The surround and immersive speakers should also be of high quality, and their tonal and temporal performance needs to match the front speakers for best integration and immersive experience. However, their sound level requirements are eased off to between 99 and 102 dB bursts depending on the channel assignments. Finally, the subwoofer scheme needs to play up to 115 dB bursts without fail and to produce that seat rumbling pressure throughout the entire listening area. That takes a lot more power than you may think! It is best handled by dividing and conquering using multiple smaller subwoofers instead of a single giant one. An ideal starting point is four subwoofers in the four corners of the room, fed by the same signal but with the ability to independently adjust the levels, delays, and frequency response. See the range of speaker systems at https://www.grimanisystems.com/loudspeakers/ for products born and bred to produce high-quality results.
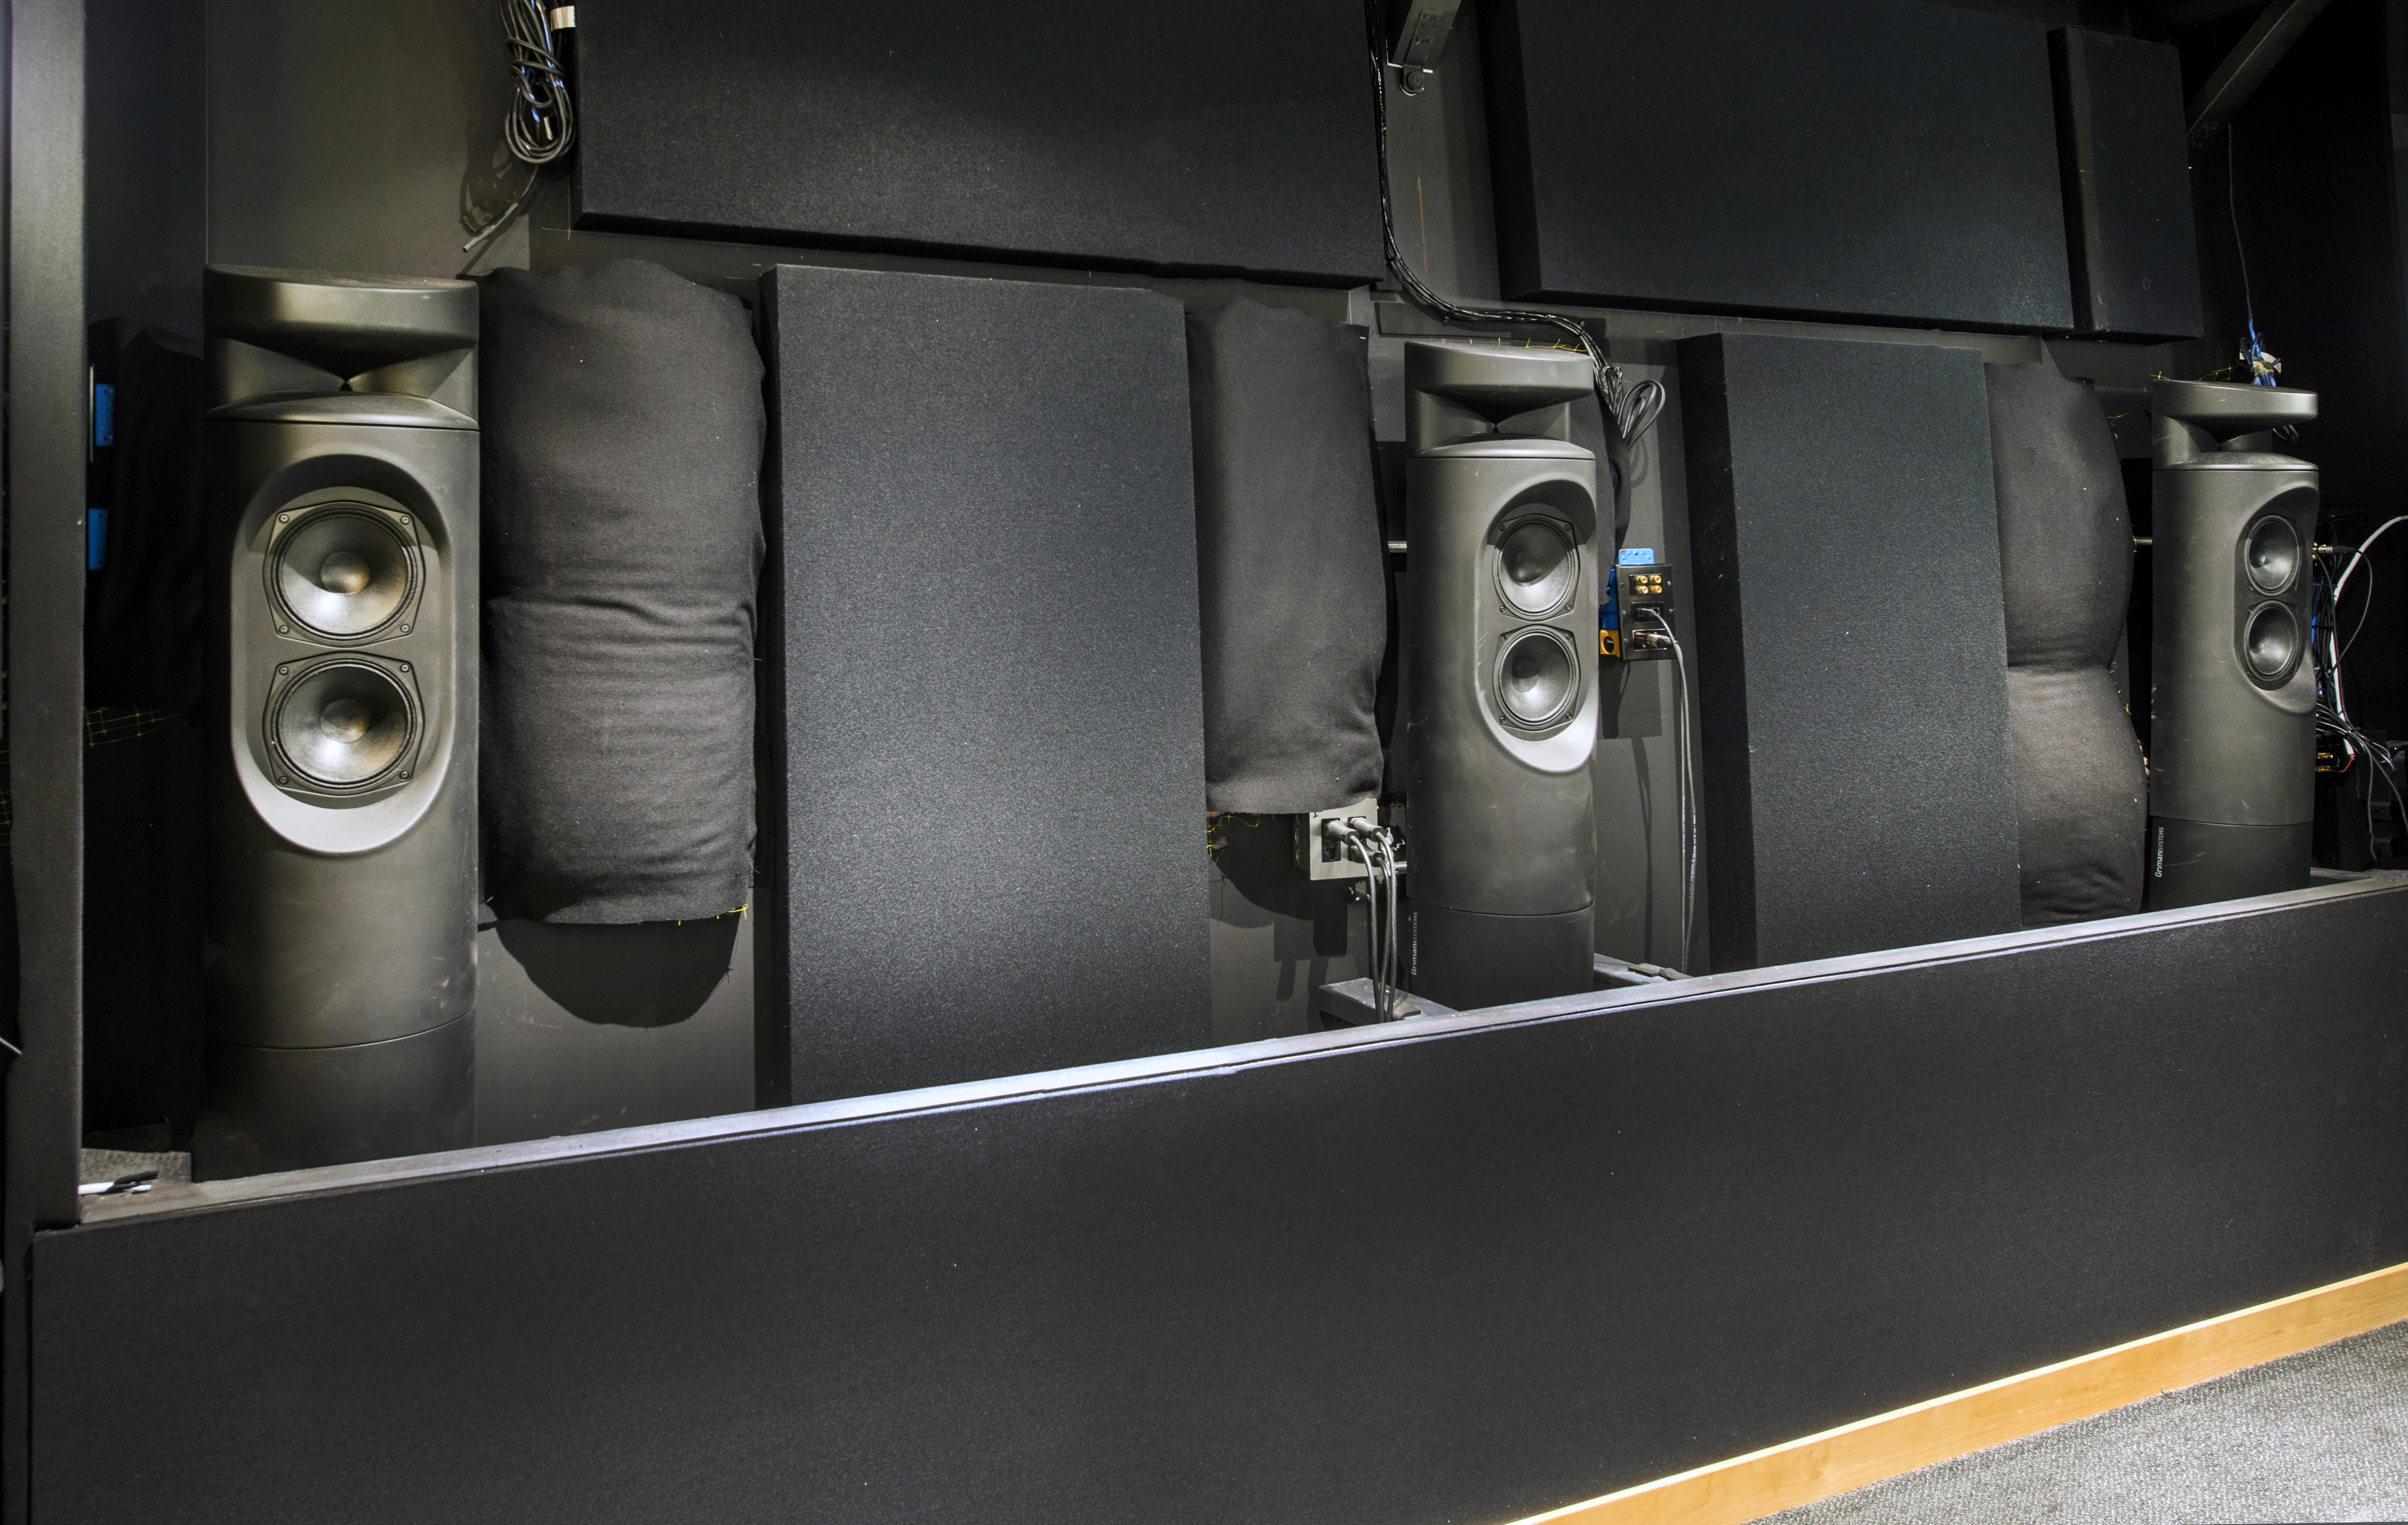 4. Aim your speakers. The best speakers in the world will not sound good if they aren’t aimed at the seating area. This applies to all speakers around the room, but it is particularly important for the Center speaker since it carries the majority of the motion picture soundtrack information. Testing for proper aiming is pretty easy: play some pink noise through each speaker in turn. Verify that it sounds consistent throughout the listening area at seated ear height. You can get pink noise test signals from many different sources, including the TK51 disc, the Dolby Atmos Demo Disk, and the Apple TV Studio Six Digital app. Aiming the speakers is a matter of using the right brackets, installing shims, etc. - whatever it takes to point the speakers at their intended radiation zones!
5. Position your speaker. You wouldn’t believe how much the sound of a speaker changes based on its position in the room. Even movements of 6" can have a profound effect, especially in the bass region! Your goal should be to position the speakers to achieve smooth, neutral frequency response as outlined above in “Calibration.” At the same time, the speakers need to be at specific places relative to the screen and seats. This can make for a maddening set of compromises and contradictions… You have to play within the limits of the rules. The following diagram shows idealized angles for all the speakers - if you didn’t have to worry about room acoustics:
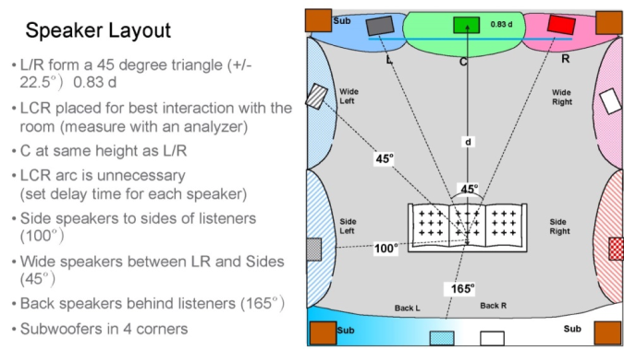
You can in fact move all of these at least 6" (15cm) and maybe a bit more for some channels, without noticing much of a change in the sound positioning. So go ahead and experiment. A good spectrum analyzer with proper test signals will help you get through the process, and this is where digital room correction equalization and room acoustical modules will also help. Try https://www.roomeqwizard.com/ along with a simple but effective UMM6 USB test microphone.
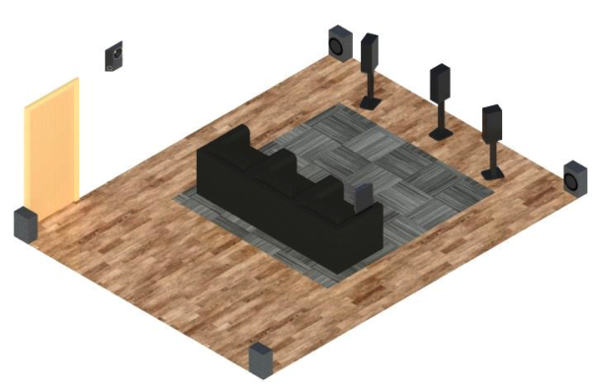
6. Position your subwoofer(s). The interaction between the room and subwoofers is even more dramatic. Changes of 1' (30cm) in subwoofer placement can have a 20 dB effect on the sound level at some frequencies. Don’t believe the legend that, since bass is omnidirectional, you can place a subwoofer anywhere. That may be true outdoors, but once you put walls and a ceiling around the subwoofer, it will be subject to acoustical standing wave resonances. Placement is everything. Our suggestion is to divide and conquer by using multiple smaller subs in the corners, fed by the same signal but with the ability to independently adjust levels, delays, and frequency response. A spectrum analyzer scheme is required, and some audio engineering chops really come in handy!
Left-Right Subwoofer Placement
7. Lower Your Background Noise. Motion picture soundtracks and music can have a wide dynamic range of sound up to 120 dB. That means some sounds are very loud while others are very subtle. If you don’t want to miss the small sonic nuances that make up the velvet of the experience, you need to keep the background noise in your room at or below 20 dB (NC). Below 10 dB (NC) is even better but can be very hard to achieve. A simple test is to plug your ears with your fingers for at least 10 seconds, then unplug and listen. You will suddenly notice all the background noise. Ventilation, heating, and cooling are common culprits, as are refrigerators, plumbing, traffic, wind, and other environmental sources. Bottom line? You need to get rid of all of it to achieve audio nirvana. You will possibly need to implement sound isolation construction around your room, and isolate the noise sources on springs, rubber pads, etc. To do this right, you’ll want to engage the services of good acoustical professionals, such as PMI Ltd.
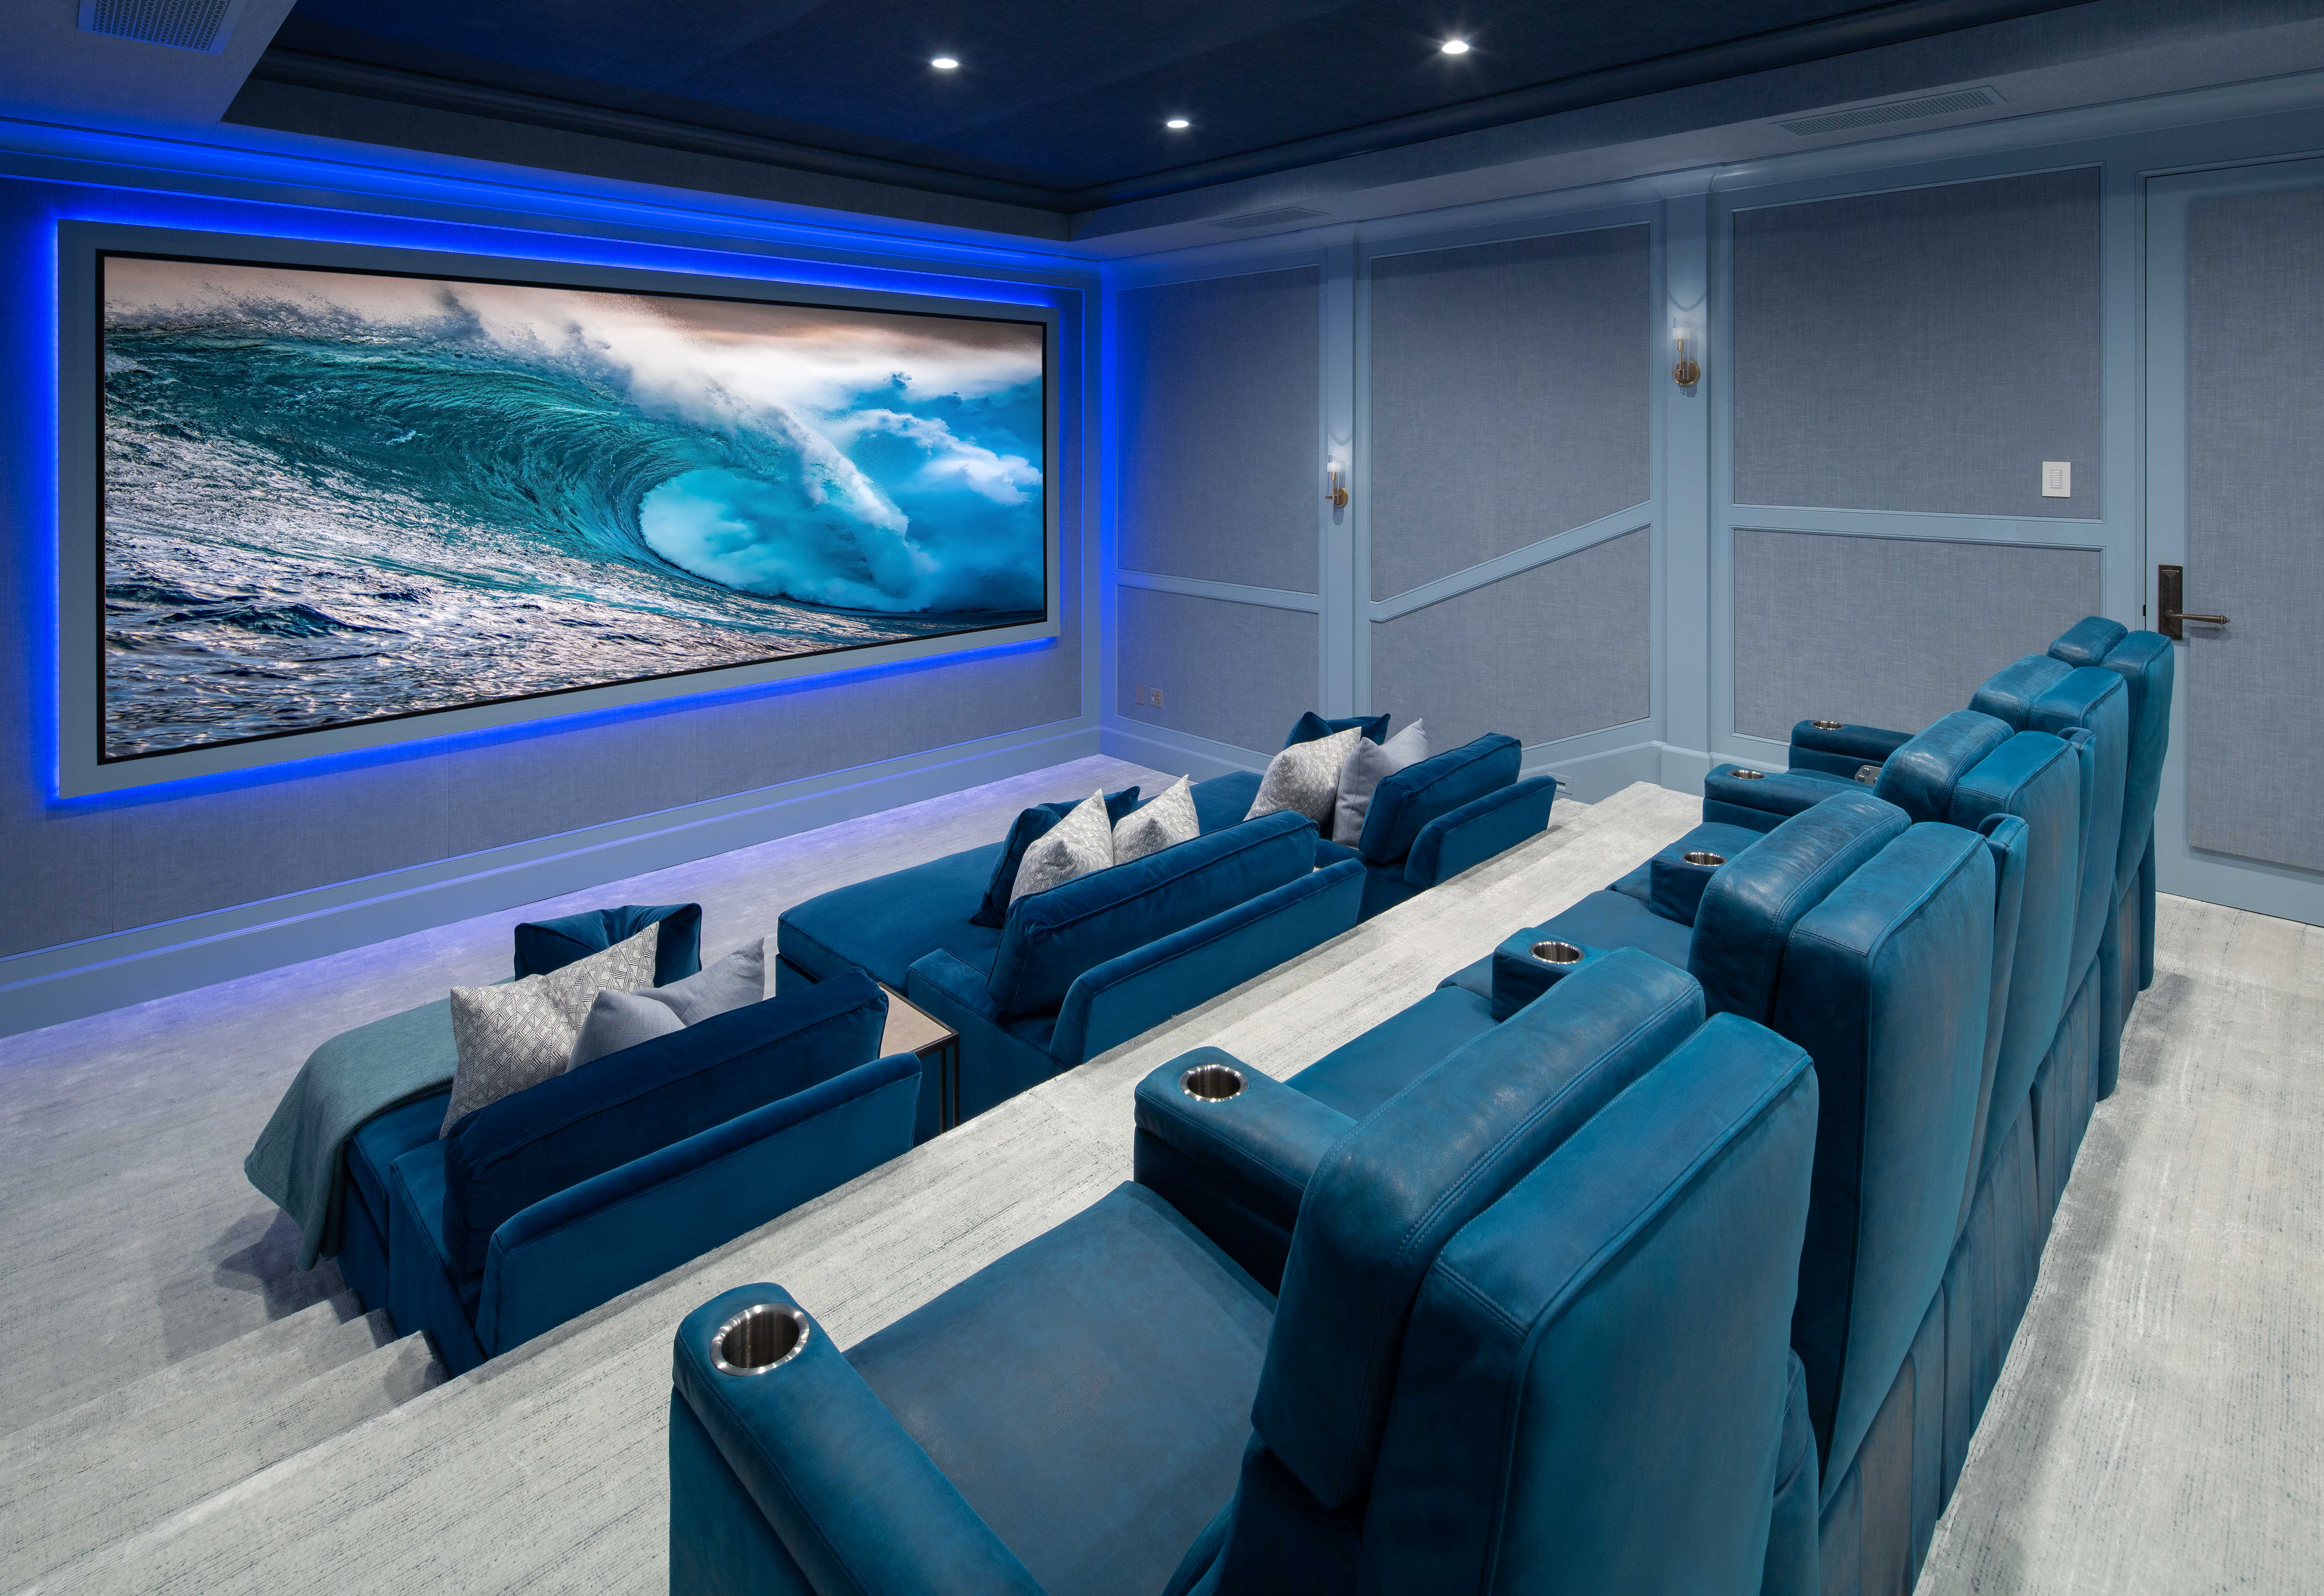 8. Position your seats and use the right type. The sound at various seating locations changes in much the same way that speakers change when you move them around the room. This is especially true for lower frequencies, as the standing waves and speaker-to-boundary interference effects are very location-dependent. Try moving your seats a bit forward or back in the room and take note of the effect. Using an analyzer with a good microphone will confirm your observations (see #5 above). While we’re on the topic of seats, a headrest with leather or vinyl surface placed near your ears will totally mess up the higher frequencies due to short sound reflections hitting back at your ears. Use lower headrests or seats with upholstery rather than reflective surfaces. You can also use headrests with perforated leather, but the perforation pattern needs to be appropriate to allow high frequencies to pass through. That means many small holes close together.
- 16AWG for runs less than 25'
- 14AWG for runs between 25' and 50'
- 12AWG for runs between 50' and 100'
- Dual 12AWG (not 10AWG) for runs between 100' and 200'
- For runs longer than 200 feet: Get the amplifier closer to the speaker!
10. Should you use “separates”? A lot has also been said about the superior nature of “separate" surround decoders and amplifiers versus integrated amplifiers and receivers. Much of that is legend from over 40 years ago! Today’s all-in-one receivers provide amazing sound, and in fact reduce interference from not having as many points of connection along the way. That being said, the manufacturers of separate components do put a bit more care into the quality of the componentry and input/output interfaces, so you may notice a modest improvement in sound quality. The biggest benefit of running a system with separates is that you can insert a digital signal processor equalizer stage between them, or use a combination EQ-plus-amplifier product. This will allow you to custom-tailor your speakers to your room. You can fine-tune the frequency response, levels, and time synchronization in ways not usually available with receivers. Some people claim that adding an EQ will "pollute" the sound, but that is also legend from over 40 years ago. Products made today work incredibly well - We have never noticed any detectability in blind A/B comparisons.
As an industry we all strive to provide our clients the very best entertainment experience possible and our goal at Performance Media Industries, SonitusUSA, and Grimani Systems is no different. To learn more, join me at the HTA Educational Session: Why Your Home Theaters Suck (And What to Do About It) on Thursday, December 10th from 2:00 – 3:00PM EST. hubs.li/H0BP0j90
Reach out to the team at PMI/Grimani Systems by clicking the icons to the right (or below if you’re on a mobile device) to learn how to take advantage of his PMI design service to do all of the above or to learn about his speakers. There is much involved to do the job right, and PMI is there to make the job easier and perform at its best.
About Anthony Grimani, President
 Anthony Grimani has a bachelor's degree in Electrical Engineering from the University of California at Davis. His 30+ years of experience in the audio industry include executive positions at Dolby Laboratories and Lucasfilm THX, and have earned him the “50 Most Vital Influencers” award from Custom Retailer magazine as well as being inducted as Fellow of the CEDIA trade association. In 2013, he was named by CEPro Magazine as one of the “Top 20 Most Influential People of the Past 20 Years.”
While at Dolby, Anthony was intricately involved in the development of surround sound for consumer applications. During his nine-year tenure at Lucasfilm THX, he managed the THX consumer licensing program and the technology development program, setting the direction for consumer and professional Audio/Video businesses. Anthony developed the Home THX program, the THX PM3 program, and invented the revolutionary Surround EX 6.1 channel audio format pioneered for the release of Star Wars: Episode 1 - The Phantom Menace.
Anthony is a frequent lecturer at industry conferences such as AES (Audio Engineering Society) and CEDIA (Custom Electronics Design and Installation Association), earning the CEDIA Top Instructor award. He holds six patents in the area of audio and acoustics, and is a frequent contributor to the industry's most read and respected trade magazines.


